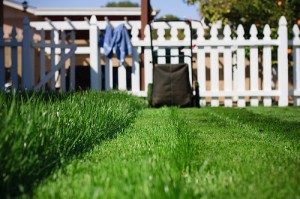
A healthy, fresh cut lawn always enhances the look of your lawn, but striping your grass takes it to a whole new level. A well-striped lawn will be the envy of all your neighbors. As is the case with most landscape design, striping requires the right technique and a bit of practice.
You probably could have guessed this, but in order to strip your lawn you need to first have a healthy one. Next you need the right equipment. There are professional grade stripers that can be purchased, but these can be quite pricey. You may be able to get away with just using the drag shield or even doing a little DIY weighing down of your roller (check back next week for more on how to do this). The basic concept is that you need some sort of device to weigh the blades of grass down and lean them over. The striping pattern is created by cutting in opposite directions so that each row of blades is leaning the opposite direction of the row next to it. This allows light to reflect off the grass at different angles making the blades leaning away appear lighter green and the blades leaning toward you appear to be a darker shade of green. Keeping your blades sharp will also help you create more defined stripes.
Another factor to keep in mind is the height of your grass blades. For more pronounced striping, it’s important to go for a longer cut. If you cut the blades too short they won’t be able to bend over as far. The type of grass you have also affects how well you can stripe. Warm season grasses found in the southern United States are more difficult to strip because the blades are usually thicker and more coarse making them harder to bend.
Before you start trying to stripe your lawn, you should decide on a pattern. You may want to start out with a simple two stripe pattern, and once you get the hang of the technique and can maintain very straight lines, advance to something more impressive like the checkerboard look.
